Thursday 31 December 2015

New Year's Resolutions?

It's that time of year. When we reflect on the year just ending and start to plan and dream about the year ahead.

I am not one to make big new years resolution announcements, for a few reasons:
  1. My work schedule in January is not conducive to starting and maintaining any new habits
  2. By openly stating any new goals I feel like there is such a set up for failure - if there is any weak moments or divergence from the goal everyone knows and it is much harder mentally, for me anyway, to get back on track. I know for others this has the reverse effect and by announcing their resolutions to the world they get the motivation and accountability they need to succeed.
  3. A resolution made on 1 January may not be relevant days, weeks or months after. Life moves quickly and what seems important in the moment, may not be in the long term. I guess that is why a lot of new years resolutions are "eat healthier" or "exercise more" - these are general and will always be things that are required in order to live a happy and healthy life. I'm not saying that I won't try to do either of these things, I'm just not sure that I need to make them a new years resolution.
What I like to do at this time, is look back on what I have achieved in the past year. We spend so much of our lives doing and being, that often the milestones and achievements pass us by without any thought or celebration.

2015 was a big year for me, especially in my craftiness:
My nine most liked Instagram posts of 2015
  • I started this blog in March and have fairly consistently posted entries.
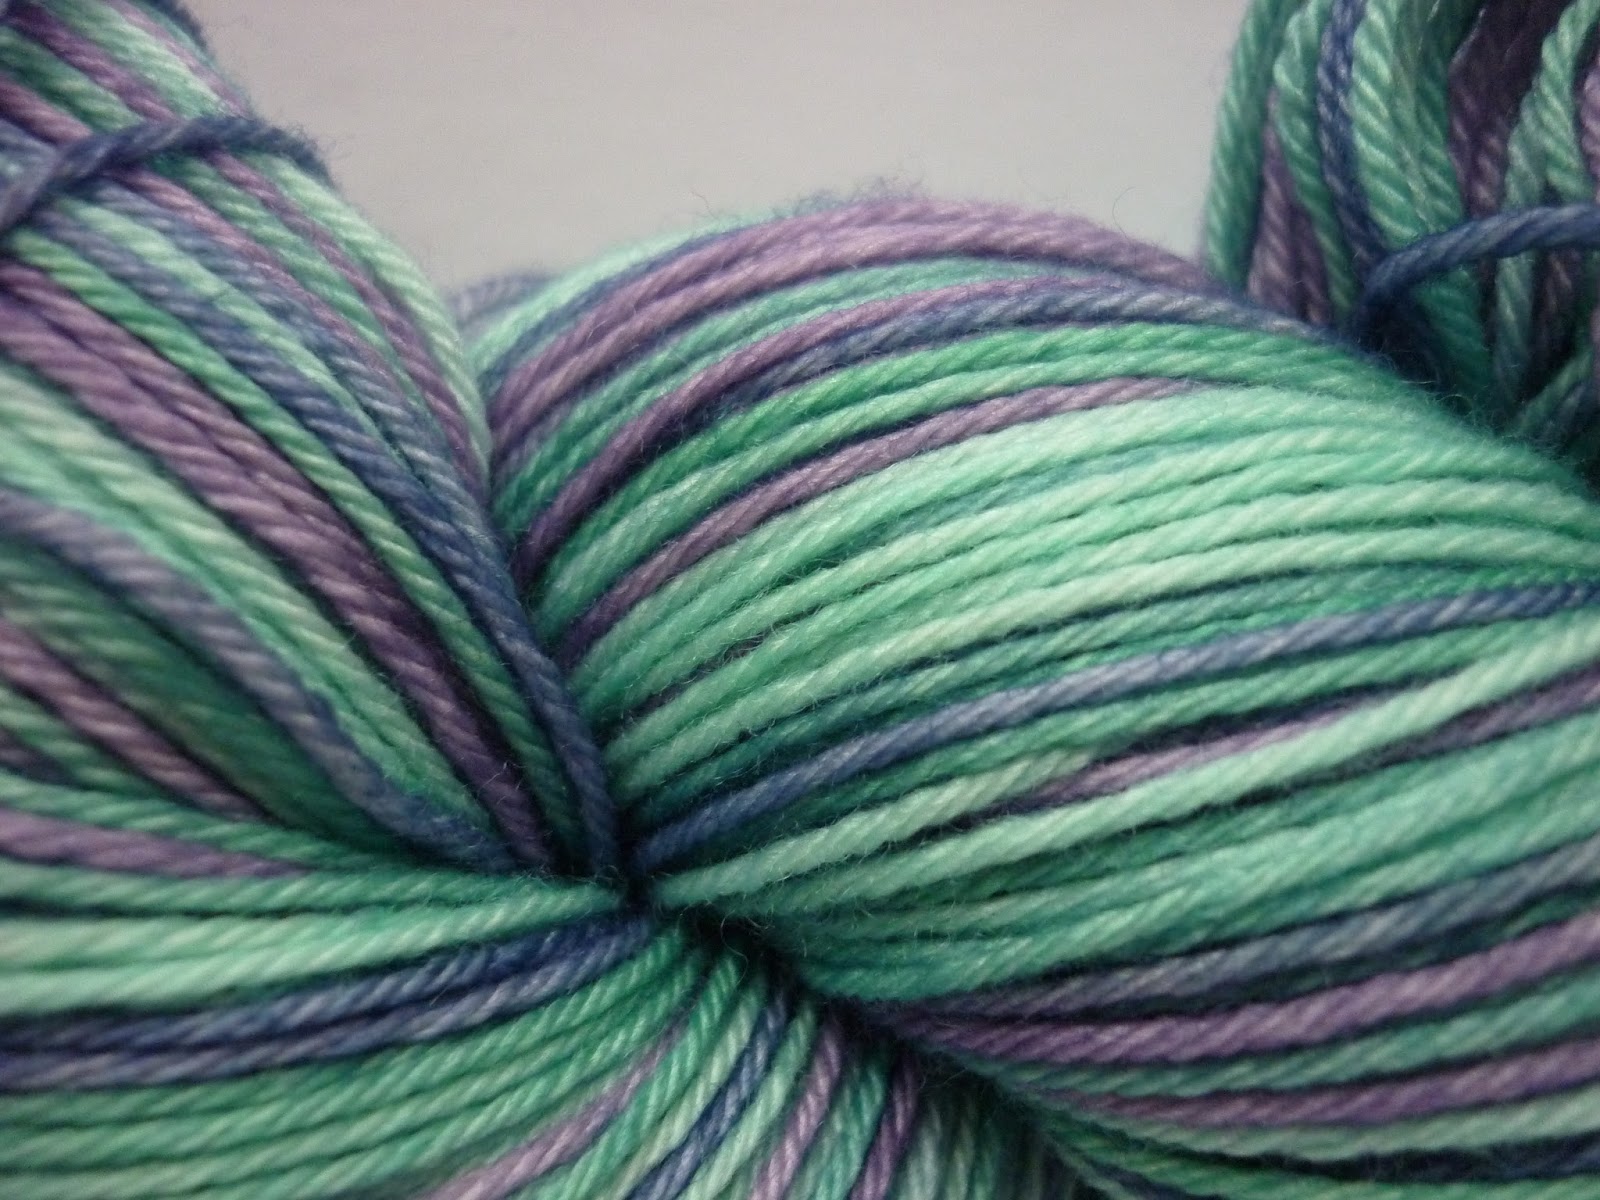
  • I started dyeing yarn, experimented and found a true passion.
  • I opened my etsy shop. AND I have had sales. It's one thing to open a shop and put my creations out into the world, but for other people to decide they want to spend their hard earned money on my yarn is an amazing feeling.
  • I knit a lot; including four shawls, a jumper, one soft toy, six beanies, two pairs of mitts (including the cupcake mittens), and at least 8 pairs of socks (I have been super lazy and have not entered my sock projects in to Ravelry).


Do I have things I want to do and achieve in 2016? YES - lots!!! I look forward to sharing my crafting progress and business growth with everyone.

Tuesday 8 December 2015

A snap shot of my dyeing process

Dyeing yarn has become a huge part of my life now, but when I started out I was not sure what I was doing. I taught myself through experimentation, reading blogs and forums and watching podcasts.

I thought I would share a little of what I do - especially for those of you out there who see it as a mysterious and complicated thing. This is certainly not a comprehensive guide or the only way to dye, it is just a little of what I have taught myself.

1. Start with undyed/bare yarn - I have some yarn that comes in pre-measured skeins, like the ones in the top left, but I also buy yarn in larger hanks and on cones, that I wind off into skeins myself. I add additional ties to each skein to stop it from tangling.

2. I use Jacquard acid dyes - these are a powder dye, activated by acid (vinegar or citric acid). I currently have 12 different colours. I use a dust mask to protect myself while mixing the powdered dyes and make a stock of each colour (a mix of the powder and water) that I keep in squeeze bottles. Then when creating colourways, I mix the stock dyes together to create unique colours. I write down each of my recipes in a note book, with steps for each layer of dye.

3. To prepare the yarn for dyeing, I soak it in slightly warm water and a little bit of wool soap.

4. Most of the time when I dye I have an end result colour in mind, the example above is my Fuchsia colourway. I took a photo of the flower from my garden and mixed the dyes with the end result in mind.

5. I measure out the dye, writing down my recipe as I go, and add it to the pot, along with vinegar and turn on the heat. I then add the wet skeins of yarn to the pot and allow the dye to absorb, keeping the water at a steady heat just below a simmer. Once the water is clear (or close to it) I remove the yarn and add another dye mixture. I usually then unravel, or re-twist the yarn, to expose different sections to the dye and place it back into the pot. Depending on the colour I could repeat this part of the process a number of times.

6. Once the final layer of colour has been applied I keep the heat on for a little longer and then put the lid on and turn off the heat. I leave the yarn in the pot and leave it to cool. This stage allows any remaining dye to be taken up by the yarn and provides residual heat to set the colour.

7. When the yarn is cool, I drain off the water and rinse, before leaving it to soak in slightly warm water and a wool soap. This removes any excess dye and washes away any vinegar.

8. Next is to get the yarn dry. For my superwash wool I give it a little spin in the washing machine (in a delicates bag) and then hang it over a drying racks to get plenty of airflow. I rotate the skeins to  help them dry evenly.

9. Final stage once the yarn is dry is to rewind the yarn back into a neat skein. I cut all of the ties and wind it into a skein. This realigns the colours and tidies up the skein after going through the dyeing process.

As I mentioned earlier, this is just one way that I use and I am mostly self taught. There are so many ways to dye, you can be very scientific or very relaxed and organic.

Wednesday 18 November 2015

Knitrospective - 5 tips I wish I knew when I started knitting

5 knitting tips

I was taught to knit by my grandmother when I was quite young. I was given a pair of straight needles, much too long for my little hands, and squeaky acrylic yarn. The stitches were cast on for me, way too tightly and I was shown how to do the knit stitch. I was told just to knit and then had the piece bound off for me when I was done. The knitting always turned out a weird shape, had dropped stitches, or extra stitches and was a boring garter strip.

Given these early experiences it took me a while after that before I went back to knitting for myself. Inspired by an urge to be creative and use my hands to make things.

I went back to basics and taught myself, by reading blogs and magazines, searching for how to's on You Tube and watching knitting podcasts.

Over time I was able to teach myself a lot, but when I look back on when I started knitting seriously, I wish I had known the following key tips:

1. A slip knot is not required to cast on, in fact knots should mostly be avoided in knitting
2. A tight cast on is caused by the lack of space between each cast on stitch, not the size of the stitch
3. Tinking back or ripping out is not failure, it is correcting a mistake you will not be happy with in the finished item
4.Choose a project you want to knit and practice on that as it is much more rewarding than a random strip or square
5. Use nice yarn and nice needles, as this is a key part of the process and adds to the Beginners should be taught to knit with good yarn and nice needles - because we should be sharing the joy and love that we have for our craft!

Sunday 8 November 2015

Polwarth Yarn

I have purchased some 100% Polwarth yarn for the shop. I have found as a knitter in Australia most of the yarn that is readily available is either Merino or labelled as just "wool". Part of the appeal of moving into dyeing my own yarn is that I can experiment with yarn compositions, combine my own colours and knit with yarn that I have never knit with before (after all I do need to sample the yarn first!!). Hopefully as I develop my shop I can expand my bases to include interesting breeds and blends, expand my own knitting experience and be able to make it accessible to other crafters.

Here is a little summary of exactly what Polwarth is:

  • developed in Victoria (Australia) in 1880s
  • bred from one-quarter Lincoln and three-quarters Merino
  • they have long, soft, fine wool and also are a good meat sheep
I began to work with it this weekend, dyeing up my first batch. I am excited to see how the finished yarn turns out, how it feels, looks and knits up.


Tuesday 3 November 2015

Set up Shop

The set up show e-course finished at the end of October. It was an information packed month of daily emails and interesting discussions on Facebook.

I have learned a lot and gained encouragement and confidence.

A big thing that stuck in my mind from doing the course was that your business will never be finished or perfect, so I have decided to stop preparing and today I opened my shop (you can click on the tab at the top of the page and go there now for a look!).

It is a big leap of faith. Will anyone like my colourways? Will anyone choose to spend their hard earned money to buy my yarn? Have I properly figured out my shipping methods? Are all the elements of my shop set up? I guess only time will tell.

A new phase of learning and development now starts and I am excited to see where it takes me.

Sunday 18 October 2015

Rest Day and Course Progress

Today is the second "rest day" of the Set up Shop e-course. We are two-thirds of the way through and I am enjoying the process of taking time each day to focus on an aspect of my new venture.

We have covered off a lot of topics including: branding, product descriptions, packaging, postage, pricing, photography, shop about page and policies, order systems, and financial records.

I have made a little progress every day, getting all the details sorted out. Some days of the course I have felt quite comfortable with, like setting up an organisation system for emails and financial recording - I was able to get these sections done quickly and without much thought. Other topics have taken multiple days, numerous drafts and much more thought.

Today I wrote a template for the product descriptions for the shop. I am also going to keep a separate file that contains a description of each colourway. I can then combine these two files to use when I list a yarn.

Another thing I tackled today was designing my ball bands. I have gone fairly basic, using my passioned flower image on the left hand side and incorporating all the details in the white space on the right. Not sure that this will be the final version, but I'm happy with what I have been able to come up with (you will have to wait for the shop launch to check them out).


I still have a lot of work to do - I need to re-work my policy page, finish my list of tags, properly research postage and packaging costs plus there is still several more lessons to go. I am loving every minute I spend on this and excited to see where it will take me.


Saturday 10 October 2015

Yarn dyeing - my journey so far

It was only at the beginning of this year that I took the plunge to try dyeing yarn.

I have experimented with sprinkling powder directly into the pot


I have squirted stock dyes directly into the pot and on to yarn with a vague plan and no intention of being able to replicate the outcome, and wound yarn for my first attempt at self striping.


I have progressed quickly from this ad hoc kind of approach, to dyeing with more intention. Basing my colour decisions on inspiration and planning the outcome of the yarn. I am taking a lot of photo's mostly of flowers and leaves, but also of the sky, sea, graffiti and anything else the catches my eye.

I now take careful and detailed notes as I dye. Tracking exact amounts of dye, the method used, steps taken and time the yarn spends in the pot.

Iris and City Sunset

Teal not Green and Winter Roses
Yarn dyeing has definitely become an obsession, a passion that I want to pursue as a business and share my creations and inspirations with other crafters.

This is a big and scary step! Putting my creations out there in to the world for judgement, not only that but embarking on a small business without much experience is quite daunting.

I have enrolled in a short e-course by Create & Thrive, called Set Up Shop. It is a step by step guide, covering all aspects of what goes in to setting up an on-line craft business. I am finding it extremely useful and thought provoking. It has been reassuring, some of what we have covered I had already considered myself. I just never had the confidence to put it in to action. Having someone who has already experienced success in this area providing this guide has given me the extra drive to push ahead.

Stayed tuned to see how things progress from here. Much work is going on in the background. I will post progress and thoughts of the course as well as updates on the shop.


Wednesday 30 September 2015

What inspires me

Most of my thoughts on the blog so far have been directly about knitting or yarn. Sharing my projects and progress.

As the seasons change and the spring flowers take over the garden I thought I would share what is currently inspiring me.

In my very first post I wrote about how craft feeds the soul, the grounding factor that creates peace and provides escape. The action of making something, creating an idea in my head, and then using my hands to make that idea come to life.

This is definitely the driving force behind why I craft. It is my escape, my happy place and my creative outlet.

Everyday, out in the world, I take note of how colour occurs in nature. The combinations of colour and the vibrancy catch my eye. How amazing are these colours from my garden this morning!?!?!

How can seeing this beauty in nature not lead to inspiration?


To begin with it makes me happy. I put hard work into my garden throughout the year and these are the results of that work. Proud displays of the care that I have taken.

Flowers and foliage are also great guides on which to base colourways for yarn. Nature has a way of getting things right, so it is fun to try to capture that in dye.

I grab my camera out frequently to capture these types of images. Fuel for my creative fire.

What inspires you? Where does your craft inspiration come from?


Wednesday 16 September 2015

Knitrospective - Shawls

What makes a great shawl? Colour? Shape? Size? Lace? Beads? Garter?

Shawls are a regular in my knitting rotation. I have a lot in my queue and library. Once I have completed one I am searching for the next one to cast on.

They are go-to accessory pieces, especially for my work wardrobe. Essential for combating the chill of air-conditioning and also for adding the "knitterly touch" to my outfits.

I began with small, one skein shawls like the Multnomah by Kate Ray, Mizzle by Patricia Martin and Pimpelliese by Christine Ebers.

Pimpelliese
I now enjoy larger multi-coloured, lace or beaded shawls. Although there is always a place for a more simple, one skein shawl in the knitting rotation (my recently knitted Reyna is an example of this).

Nuvem has been on my needles twice, and could definitely be knit again.


My Hope

The two most intricate shawls I have knit have not been for me, but made as special gifts. The My Hope for my sister on her wedding day and Bella Botanica for my mother-in-law for Christmas. Both had beading and lace work and I loved the process of knitting each of them. I know both have been worn numerous times, which makes me happy. What I am disappointed about it that in both cases I never took proper finished object pictures, only progress and blocking shots.


I think I will at some stage have to knit a lace and bead shawl for myself, but at the moment I am enjoying the squishy garter and fun colour combinations from patterns like Drachenfels and Moonraker by Melanie Berg.

Moonraker
A shawl that was in my queue for a very long time was Bloom, which I finished earlier this year. I wrote a full blog post on the finished object. I have worn it at work and received many compliments - it has some wow factor. I am thinking about yarn combinations for another one.

Bloom
So what is the best kind of shawl? It's much too difficult to decide, I guess I will have to keep knitting more to try out more patterns, colour combinations, shapes and techniques.

Sunday 30 August 2015

Digging into the stash - knitting with that "special skein"

After taking the time to review my stash in preparation for Bendigo (see previous post), I rediscovered some amazing yarn. Not forgotten, more like I had moved it to the back because I did not know what to do with it and felt that it was too special to knit with.


I found a simple shawl pattern on Ravelry; Reyna by Noora Laivola. I liked that it had garter and some lace sections, without being a complicated pattern. As I wanted the yarn to be the star.


During this dig into the stash, I also realised how many partial skeins I have. Leftovers from socks and shawls, but not enough to think of as scraps. So out came the scales and I weighed the portions that I had, sorting them into size piles as I went. The Moonraker Shawl, by Melanie Berg, seemed like the perfect way to incorporate a couple of my smaller skeins into a large project.

My small skeins are from two projects that I really enjoyed. They are a sparkly purple left over from my Low Tide Cardigan and a sparkly blue/grey from the My Hope shawl I made my sister for her wedding.


Sunday 9 August 2015

Finished Object - Bloom Shawl

It was so great to come back from Bendigo with yarn for specific projects and so motivating to cast on straight away.

When I arrived home on the Sunday afternoon I immediately balled up the charcoal and teal corriedale I had purchased for Colleens Crafts to make the Bloom Shawl by Kiri FitzGerald-Hillier.

The version of the pattern I followed is the original as it was published in Issue 31 of Yarn Magazine.

My default for reading patterns is the written instructions and then referring to a chart, if provided, as a reminder guide as I complete each round. After completing this pattern, my advice for anyone else is to follow the charts, as the written directions seem to be inaccurate or at least confusing in parts.

First thing I did was find a tutorial on how to do the pinhole cast on - I used the one from Very Pink Knits. It took me a couple of tries to get it right but overall not a hard thing to master.
.
The directions were for 5 dpns, but I knit the whole motif on magic loop. One thing that was not clear in the written directions was where to place markers - to split the motif into its four sections. If I had realised this earlier I would have been able to get this information from the chart. I guessed a little as I went along and I think in the end it is not noticeable that I fudged it a bit.
I made several modifications in the wing sections. For the decreases on both the left and right wings I knit two together through the back loop. I tried a few different decreases and decided that in the garter stitch I liked the look of this method best. I flipped the wings, so that the decrease side was the top edge, the finish and angle of the wing seemed to lay better that way. I also connected the blacks at the top of the motif together by knitting the last black stitch of one wing with the first black stitch of the other.

This was a super quick knit - it took me 15 days and zoomed along. I think part of the reason for this, apart from being knit in a DK, was that until you get to the edging there are really not many stitches on the needles, so the rows are short.

In the end I used all but 8 grams of the charcoal (from 213 grams). I do have plenty of the teal left, having only used 40 grams of a 100 gram skein.

I wet blocked the shawl, using blocking wires on the motif to make it square. Then pinned the wings and edge into shape around that square. I also pinned out each point of the lace pattern.


Saturday 25 July 2015

The Bendigo Haul

Shawl pins from All Buttoned Up
I had such as wonderful time at Bendigo this year.

Did I stick to my list? Pretty much.

I have added all my new yarn to my Ravelry stash already, but wanted to do a blog post to highlight all the great vendors.

Needles and cables - all purchased from Fiberific!.
Two ChiaoGoo "Spin Cables", 75cm and 125cm. For most things I prefer these over the red twist cable as the are more flexible and they spin at their base which I really like.
Wool N Wire stitch markers
Three sets of the "Twist" Lace needle tips in sizes 2.75mm, 3.5mm and 4mm - sizes that I regularly use.

Accessories and stitch markers
Two shawl pins from All Buttoned Up - Vintage Jewellery Melbourne.
A set of blinglets medium sized stitch markers from Fiberific!
A set of stitch markers from Wool N Wire


Yarn
Dyed by Hand Yarns (top three skeins):
White Gum Wool DK - 2 skeins in Purple Sea Urchin
Tough Stocking (4ply)- 1 skein in Blue Ringed Octopus
Tough Stocking (4ply) - 1 skein in a "one hit wonder" purple colourway

Colleens Crafts (first two, bottom row left to right) :
Corriedale DK - 2 skeins in Sage Green Tones
Corriedale DK - 2 skeins in Charcoal

Mayhem & Chaos (middle right and bottom right):
Crazy Eights (DK/8ply) - Voodoo Lady - enough for a sweater (thinking this will be the main colour for the Pixelated Pullover)
Lollisox - Taste the Rainbow - sample of fingering weight


Thursday 16 July 2015

What to wear to Bendigo?

A quick post this week, as I prepare to head to Bendi this weekend.

The shopping list is prepared. I have added some tools to the list too; additional Chiagoo needle tips and the twist cables.

Travel plans are set. I am driving to a friends on Friday afternoon to catch up, craft and have some wines. Saturday we are driving to Bendigo together, then back to her house to “play” with our purchases.

Final thing to sort out, I think is the toughest – what am I going to wear!?!?

I have three suitably warm knit tops. MirandaCharleston Tea and Tric. Yarns for all three of these projects were purchased from previous Bendigo trips. They are all comfortable and I'm really pleased with them and proud to show them off. So I am thinking I may pack all three and decide on the day.

The hardest part to choose is the rest of the outfit and knit accessories. Victoria has been experiencing an extremely wet and cold winter, and Bendigo has a reputation for being extremely cold. Gloves, scarf, beanie etc will be essential. But how much knit is too much knit?? Is there such a thing? Also need to keep in mind that I will probably also need a coat (which then covers up all the knitting) and I think gumboots will be the footwear of choice (with hand knit socks of course). My blanket box is full of choices, will be hard to decide. I may end up taking a lot of this with me!!

How do I choose what to wear from so many knitted accessories??

Wednesday 8 July 2015

Thoughts of Bendigo Sheep and Wool Festival

It's dark and it's cold! You would think the perfect time for knitting. But I am making slow progress. A couple of reasons come to mind; my hands are cold at home, so I find it hard to knit, but the more prominent reason is that I want to knit all the things. Distracted by thoughts of the up-coming Bendigo Sheep and Wool Festival next weekend.

So what has been taking up what should be knitting time? Knit planning!!

I know that I want to knit more sweaters and multicoloured shawls. At the moment whenever I look on Ravelry, these are what I am drawn towards.

I am really enjoying wearing my current selection of coloured shawls as they are great fashion pieces and practical for keeping warm in cool air-conditioned offices. And as far as garments are concerned I feel that I have only just begun to get into this part of knitting and want to expand my wardrobe for more occasions and weather.

My library, queue and favourites are already filled with projects that I have added over time. I have been going through each of these areas as a starting point for new projects, especially from my library. It is amazing how many patterns are in my library that I have not yet knit, I purchased them because I liked them and intended to knit them but they have been left unloved and unknit. I am not the world's fastest knitter, so this will not be rectified in the short term, but at least I have reminded myself that when I have an urge to cast something on I should check my library first.

So what stands out to me now?


I also want to knit multi-coloured shawls and have a collection of them in my library (mostly by Melanie Berg).

I have looked at my stash, and I have potential yarns for coloured shawls, lots of single sock skeins, but nothing in stash for the sweaters. It is interesting to reflect and review the stash. I will take a deeper look at stash in another post in the coming weeks (maybe after I have added to it at Bendigo and need to do a proper update/audit of everything!).

My lists are almost complete. I have made notes on yardage and yarn types for these projects and also have in mind a rough idea of colours. But once I am in the midst of all that yarn I know I will get carried away and probably come home with some skeins that are pretty rather than practical. That is, of course, all part of the fun.

Tuesday 30 June 2015

Cupcake mittens, deadlines and making changes to the pattern

My sister requested that I make her Cupcake Mittens.They looked super cute, so agreed that I would give them a go.

I am satisfied with the end result and pretty happy with my colour work, but these were a hard slog.

The beginning of this project caused me frustration. I had trouble getting gauge, first they were too loose, then they were too tight - playing with needle size and stitch counts until I on the fourth try I was happy with the cuff. I also found that by knitting the cupcakes on the palm as well as the back of the hand the mitt was very tight (partly I think due to my inexperience in colour work). So I chose to rip back to the cuff and change the pattern. I knit the cupcakes on only the back of the hand, five on the first row, four on the next and then alternated those two rows. I also knit three plain rows in between, in order to give myself a break from the colour work, provide an opportunity to knit in ends as I went and to hopefully prevent the overall mitten from being too tight.

I also changed the pattern further, by making the mitts convertible. I used the directions from the ChemKnits tutorial for transforming any mitten knitting pattern into convertible mittens.

After three repeats into the cupcakes on the first mitt, I thought that the thumb as written in the pattern was going to end up making the mitts too tight and not sit correctly, so I made the decision to start adding in a thumb gusset. The end result was a stumpy looking thumb that looked weird and felt wrong. I blocked it so see how it would end up, and had my sister try it on. Immediately I knew I had made the wrong decision with the thumb. I put that completed mitt aside and started the second one, following the pattern.

Although the first mitt ended as a bit of a fail, it had actually knit up quickly once I had started. So I was keen to get going on the second one to get it right. But the one by one twisted rib on 2mm needles broke me and I struggled to get it going. I knew I had a deadline, my sister was waiting for these mitts and now, not only did I have to knit the second one, but I had to go back and see if I could save the first!! But the brain is a funny thing, right? I wanted to cast on other things, or didn't feel like knitting at all. I think if I had no deadline and the first one had been a success I would have been into it and quickly finished the second. But with the weather getting colder and my sister eagerly expecting the finished pair, progress on the second one was slow.

I think I was also dragging on knitting it, because I knew I was going to have to tackle fixing the first one when I was done.

To begin this process I looked to see if I could rip it out from the bind off, but because it had been blocked, the ends were hard to find and it had fused together a bit, not felted, but just difficult to rip out. So I grabbed a pair of scissors and cut the top off the mitts, just above where I needed to restart with the thumb as written in the pattern.


As painful as that was, it ended up being the best option. Once I had taken the plunge, ripping out and picked back up where it needed to be I felt so much better and it took me less then a week to then knit up the rest of the mitt.

Lessons learned:

  • I really do not react well to deadline knitting (when the recipient is expecting the item).
  • I should have followed the pattern;
  • or at least read it through first - perhaps if I had read the entire pattern I would have started a thumb gusset earlier, preventing the stumpy thumb I created.
  • I enjoy the result of colour work and would like to do more, perhaps on a jumper.

Thursday 11 June 2015

knitrospective - inside my notions bags

This is not so much a look back, but a look inside. Something I have developed over time is the contents of my notions bag. It has gone through many stages. Starting out with not much in it, to bulging at the seams, to a now pared back version of what are my essentials. There is quite a lot jammed into this little bag, but everything is there for a reason.


Let's take a look...

- Tapestry needles - a small plastic case with needles of varying sizes for darning, weaving in ends and grafting

- Zip lock bag of spare yarn - for holding stitches, inserting the spot for an afterthought heel and emergency stitch markers. I keep it in little butterflies in the ziplock bag to stop it getting tangled

- Measuring tape and safety pins - both fairly self explanatory and always come in handy (my marathon running husband has even been happy I take my notions bag with me everywhere as he has needed extra safety pins for his events bibs)

- Emery boards - for fingernail snags but also for needle snags (small rough patches on wooden needles or small imperfections that sometimes occur on the cables of circular needles).

- Three bags of stitch markers
  • a set of the plastic locking markers for holding dropped stitches or marking increases and decreases
  • pretty markers; mostly small gauge with beads and some cute dangly sheep - I generally use these ones for marking the beginning of a round, sleeves, back/front etc
  • larger, closed rings; that I use for marking pattern repeats - a little repurposing with these ones - they are the rings from old bras that I cut the rings out of


- "Stabby things" - this metal container (also repurposed, originally the case for a stylus pen) holds all my pointy things. Two different sized crochet hooks. A cable needle. Needle threader. Fold up scissors - they take up less space, and if left in a bag with knitting will not snag or cut accidentally. A tapestry needle. I also include in this case a small measuring tape, two stitch holders (not pictured, as they are currently in use on a project I will be talking about on the blog in the next few weeks), a few stitch markers and a pencil. I can then grab this case out and put into a small project bag knowing I have the essentials.


My preference for pencils are these mechanical ones. They do not require a sharpener, draw a precise clean line and have a retractible tip.

The final thing in my bag is the cute little container pictured below. I think of this as my mini notions kit and is perfect for throwing into an "on-to-go" sock project. Light, compact, and useful. In it there is a length of yarn for a lifeline or afterthought heel, a locking stitch marker and a few elastic rings to use as stitch markers.


So, these are the essentials for my notions bag. What do you keep in yours? What tool can you not do without for a project on the go? I think I am at the point that I have the contents of my notions bag set, but interested to see what other people use as there are always new ideas and different ways of approaching things.

Tuesday 2 June 2015

First attempt at self-striping sock yarn

After dying for longer colour repeats on a chunky yarn, I decided the next thing to try was a self-striping sock yarn.

I used the same method for winding and dying the yarn as I used for the previous experiment and again sectioned the yarn into four equal sections.

Colours used this time around:
a light blue/green - mixed using emerald and turquoise
a dark green - mixed using emerald and turquoise
light purple - straight from dye stock
gun metal - straight from dye stock

The bottom image is the toe of a sock, I could not wait to cast something on. I am fairly happy with how it has come out, although the stripes are not very thick. For thicker stripes I am either going to have to limit myself to two colours per skein, or find a new piece of equipment to wind longer skeins.


Monday 25 May 2015

Dying for longer colour repeats - Part 2

I am so pleased with how this turned out, especially given that it is my first attempt at longer colour repeats.

As promised last week, here is my dying process, in pictures.


After the skein was dry I was keen to get it back into a shorter skein, but a little worried about how I was going to do this without creating a giant knot! Luckily for me the door handles in my craft room are the perfect distance apart to loop my long skeins around and then wind on to my umbrella swift. I managed to get it wound without any tangles and it didn't take too long.


I am sending this skein to a friend. She had seen the yarn I had dyed to match my winter coat and asked if I could dye her some chunky yarn for a cowl she wanted to knit. I am excited to see how it will knit up.

I now have ideas for trying gradients and self striping, based on what I was able to achieve with my first attempt at longer colour repeats.

My equipment is clearly very basic but for now it works. I am getting results that I am really happy with and having fun along the way.