Monday 25 May 2015

Dying for longer colour repeats - Part 2

I am so pleased with how this turned out, especially given that it is my first attempt at longer colour repeats.

As promised last week, here is my dying process, in pictures.


After the skein was dry I was keen to get it back into a shorter skein, but a little worried about how I was going to do this without creating a giant knot! Luckily for me the door handles in my craft room are the perfect distance apart to loop my long skeins around and then wind on to my umbrella swift. I managed to get it wound without any tangles and it didn't take too long.


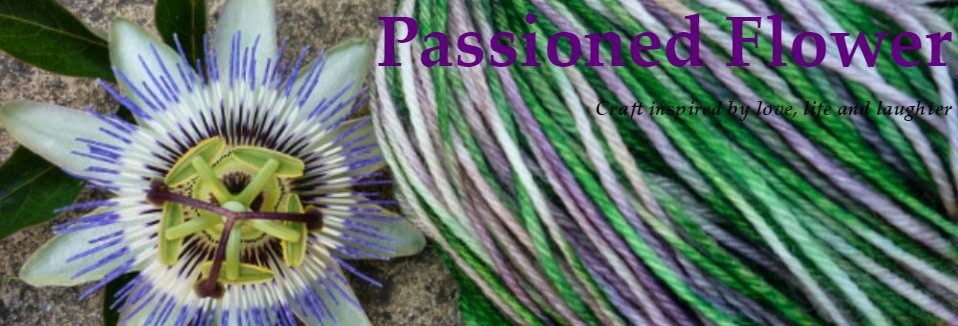
I am sending this skein to a friend. She had seen the yarn I had dyed to match my winter coat and asked if I could dye her some chunky yarn for a cowl she wanted to knit. I am excited to see how it will knit up.

I now have ideas for trying gradients and self striping, based on what I was able to achieve with my first attempt at longer colour repeats.

My equipment is clearly very basic but for now it works. I am getting results that I am really happy with and having fun along the way.

Saturday 23 May 2015

Dying for longer colour repeats - Part 1

Up until now all my dying projects have resulted in highly variegated colour-ways. I have kept the skein the size I purchased it in, and dyed the entire skein in one go.

So, for this dye project I made a longer skein and dyed it in four sections.


First I had to figure out how I was going to create a longer skein. I do not have a warping board, or even flat back chairs that I could run the yarn between.


I scanned the house for something that could work. I settled on the coffee table, flipped upside down, and wrapped the yarn around the legs in a Z pattern.


My first attempt I confused the way I was wrapping the yarn, not realising until I was tying it. This led to rewinding the yarn back into a ball, untangling as I went. The second attempt I chanted to myself as I wrapped - over, under, over, under - so I would not make the same mistake again.

 I tied up the skein with numerous ties, made it into a loose crochet chain and left it to soak.

Now for the dying...
I dye in my kitchen and do not have the space to attempt hand painting, so I needed a plan to that would allow me to still do immersion dying but in sections.

I set up my baking tray on the stove top, and then a tub for the undyed portion of the yarn and a pot for the dyed portions.


I had put temporary ties in the long skein to split it in to four sections, as I fed each section into the pan I removed these ties and made sure that the dye overlapped at these points so there was no white.

Colours for this project:
section 1: emerald and turquoise
section 2: purple and periwinkle
section 3: orange and russet
section 4: sky blue

I posted a mid-dying colour photo on Instagram (link on the left).

Check the blog next week to see the colour progressions, what solution I come up with for re-skeining my long skein back to a "normal" sized skein and the finished dying project.


Thursday 14 May 2015

knitrospective - socks

For this knitrospective I wanted to look at my journey in sock knitting.

When I first started getting serious about knitting I read quite a lot of blogs, I did not (and still don't) have a knit group so everything I learned was what I found out for myself online.

My current "vanilla socks"
I really didn't have any fear when it came to trying new things or starting a different kind of project, after all it is just yarn and the worst that can happen is that you rip it out and start again. I did that back then and I still do it now. I have even put terror into a group of people at work, when while knitting at lunchtime I decided that the socks I was working on were not right, so I just pulled out the needles and ripped. Why continue if you know it's not right.

Quite early on I decided that I wanted to knit socks, because it seemed like the thing to do and the idea of hand knit socks really excited me. Everywhere I was reading about "plain vanilla" socks and I thought that this was some magical universal pattern, a secret amongst knitters. I searched the internet, looking for the plain vanilla sock pattern, but nothing had that name. So I found a pattern that sounded simple enough and gave it a go. Only after knitting those socks and more internet research did I actually find out what plain vanilla meant, and that for each person these can end up being completely different. I now have my plain vanilla's - 56sts, 2.75mm magic loop or 2 circs, toe-up, short row heel (knit from the other end of the ball if I don't want to break up the striping pattern), short cuff.

But it does take a while to get to that point with socks, discovering the preferences of the toe shape, cuff length, heel shaping is all very personal and only becomes right with trial and error. I also like to explore new techniques and heels to see if there might be another way I would prefer.

Below are my very first pair of socks. They are pilled, have a hole in the cuff and are not even the same size. But I love them and I use them as bed socks. I don't know what pattern they are knit from (done before Ravelry), I know I knit them on double points, but I clearly had inconsistent gauge, maybe even different stitch counts and didn't understand that I needed to alter the stitch count in order to get socks that fit.


I have since knit eleven pairs of socks that I have listed in Ravelry. And I think at least another four pairs that were knit prior to Rav and gifted. I would not call myself a pro sock knitter, but I do like to always have a pair on the needles and will continue to add to my sock drawer.


Thursday 7 May 2015

Dye project - to match my winter coat

Years ago I bought a pink coat. Since then I have not really had any accessories that matched. Now that I have an urge to dye everything, I thought I could try to make my own colourway to knit into a beanie and mitts.

I know I could easily just knit in a black or neutral colour, but I wanted something bright and cheery.

For this experiment I used my large baking tray and heated the water on the stove top.

I used Skein Yarn, two of her DK natural skeins. The base is really soft and springy.

Colours for this project were pink, russet, orange, purple and gun metal. Using my solution stock and squeeze bottles.

The yarn was pre-soaked in water and then bought up to temperature in vinegary water. The yarn was placed in a semi-circle/horseshoe shape in the pan.

On the edges I layered the pink, russet and orange  - squirting the dye solution directly on to the yarn. The purple and gun metal was squeezed on the middle section. I let it cook a little and then added more colour to the whiter spots and squirting some dye directly into the water rather than on the yarn.


Once I was happy with the colours I covered the tray with foil, kept it on the heat for about 20mins and then left it to steam and cool. Only when the water was completely cool did I drain, the now clear water, and soak in fresh cold water. As the yarn hung to dry, I could already see the effect I was able to get by mixing the pink, orange and russet and then the blending at the edges with the gun metal and purple.

I am really pleased with the results. I had the idea in my head of how I wanted it to turn out and it actually worked! The mixture of orange and pink together created a really great colour, that will go well with the coat and the purple and gun metal break up the pink and helped to mute out the russet.


Friday 1 May 2015

Finished Object - Miranda Sweater

This is the quickest sweater I have ever knit! I just checked my Ravelry page and I shocked myself. I started it on March 10 and finished the knitting on 19 April. I did however swatch for this project about a year ago, so in a way it has still been a long time coming.

Here is a breakdown of the project:

Pattern: Miranda by Josée Paquin

Needles: US 6 (4mm) and US 8 (5mm)
Yarn: Bennett & Gregor Wirraworra - 494 grams
Colourway: Wattlebark - (Brown)
Purchased at: Bendigo Sheep & Wool Festival 2013

With weaving in the ends (not that there were many as I used one giant ball) and blocking it was officially completed on 25 April.

Modifications:
  • added 7 stitches at the underarm and then decreased back over the following 2 rows - I always find that there is a large gap if no stitches are added at the underarm and better to knit the fix into the garment than have to sew up a hole at the end
  • I missed a small section of the pattern that asked to knit 4 rows without increases before putting the sleeve stitches on holders. Instead I added the 4 rows without shaping directly below the arm holes. The fit does not seem to be impacted by this 
Notes:
  • The pattern was very wordy, which made it more difficult to follow (and hence why I missed the section mentioned above).
  • For each section/row I wrote out the number of the pattern repeat row and marked out where the increases would fall. Then as I knit each row I crossed off the pattern row number, to keep track of the middle panel.
  • When it came to increasing the front panel I felt the instructions were not 100% clear. The edges may not have worked out perfectly, I just made sure that I read my knitting and followed the pattern as already established as much as possible.
  • I used almost all of the 494grams. I knit all of the giant ball and then knit directly from my swatch to finish the second sleeve. I had knit two swatches, one flat and one in the round - if I had only knit one swatch I would have had enough to finish the sweater.
The weather is starting to get cold, so looking forward to an opportunity to wear it. I will try to get an "out in the wild" picture soon, and will post it to instagram.